Finding an app that delivers good operation and a good experience to run Windows on portable consoles is not always an easy task. However, an application called Playnitis can be the big solution to your interface problems of these devices. Then check out the details about it.
What is Playnite?
Playnite is an open source game library manager for PC, able to provide a better organization to access games, something different from what happens when you only use Windows without this tool.
Where and how to download the app?
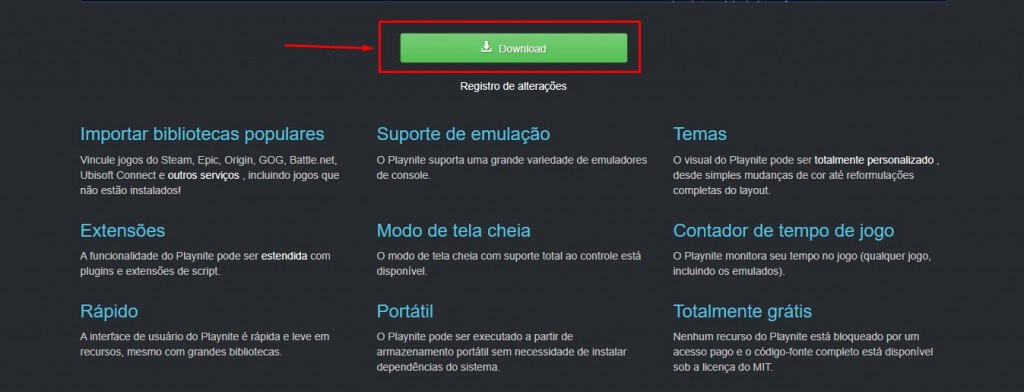
Playnitis can be downloaded through your official website. At the bottom of the page there is the button to download free app. When downloading it, you should open the installer and choose the normal installation on the device or portable.
The second option allows you to put the app to a USB and take your library wherever you want. When opening the app, just follow the step by step to customize according to your preferences.
Playnitis differentials
As a great differential for portable consoles, the tool initially allows you to connect all your accounts, such as Steam, Gog, Xbox, Pass and Epic, unifying your games library without having to alternate boots to access certain titles.
The manager also extracts the cover art and the necessary metadata of most games in high quality, which provides an excellent presentation of the game. In addition, if you are adding independent “.exe” emulators or “.exe” files, you can define the art and customization details.

It is also worth mentioning the interface, which has two views: a normal desktop mode and a full screen mode, which looks like a console interface.
How to add games and emulators?
Although Playnite automatically organizes the games of other Launchers, it is also possible to add games installed on the outside. To do this, just click on the control orange icon, located in the upper left corner of the app screen, click “Add Games” and then select “Scan automatically”.
Then a screen will open with the “search” option. In it you will manually select the .exe file of the game you want or “detect installation” to appear a list of all installed games.
On the other hand, to add emulators games, you need to configure an emulator. In the Playnite Library, press CTRL + T to open the emulator screen. Then click “Add” at the bottom and make the settings in the options that are on the right. Put the name of the emulator, the source folder and add the emulator to the list of specifications. Lastly, in the profile part, click “Add” and select “Default”.
Now you need to add the emulated games. Tighten Ctrl + Q. On the screen that will open, tap “Add Scanner”, select the emulator that was added to the first box and the default profile. Then take the folder with the game files through the “scan folder” option, click “Start Scanning” and wait, then, will appear the titles.